Window and siding repair isn't something we advertise. Our core work is drywall finishing and interior painting. That's what we do on most jobs, every week, across Delaware and Otsego County. But every now and then a homeowner calls us in a situation where they're completely stuck, nobody else has been able to figure out what's wrong, and the damage keeps getting worse. When that happens, we don't turn it down just because it falls outside the usual scope.
This is the story of one of those jobs. A homeowner in Halcottsville, NY, a small community in the western Catskills in Delaware County, had been dealing with a persistent leak near a window for years. Multiple contractors had looked at it. Nobody had fixed it. By the time we got there, the framing was in serious trouble.
What We Found: A Flashing Detail That Was Never Right
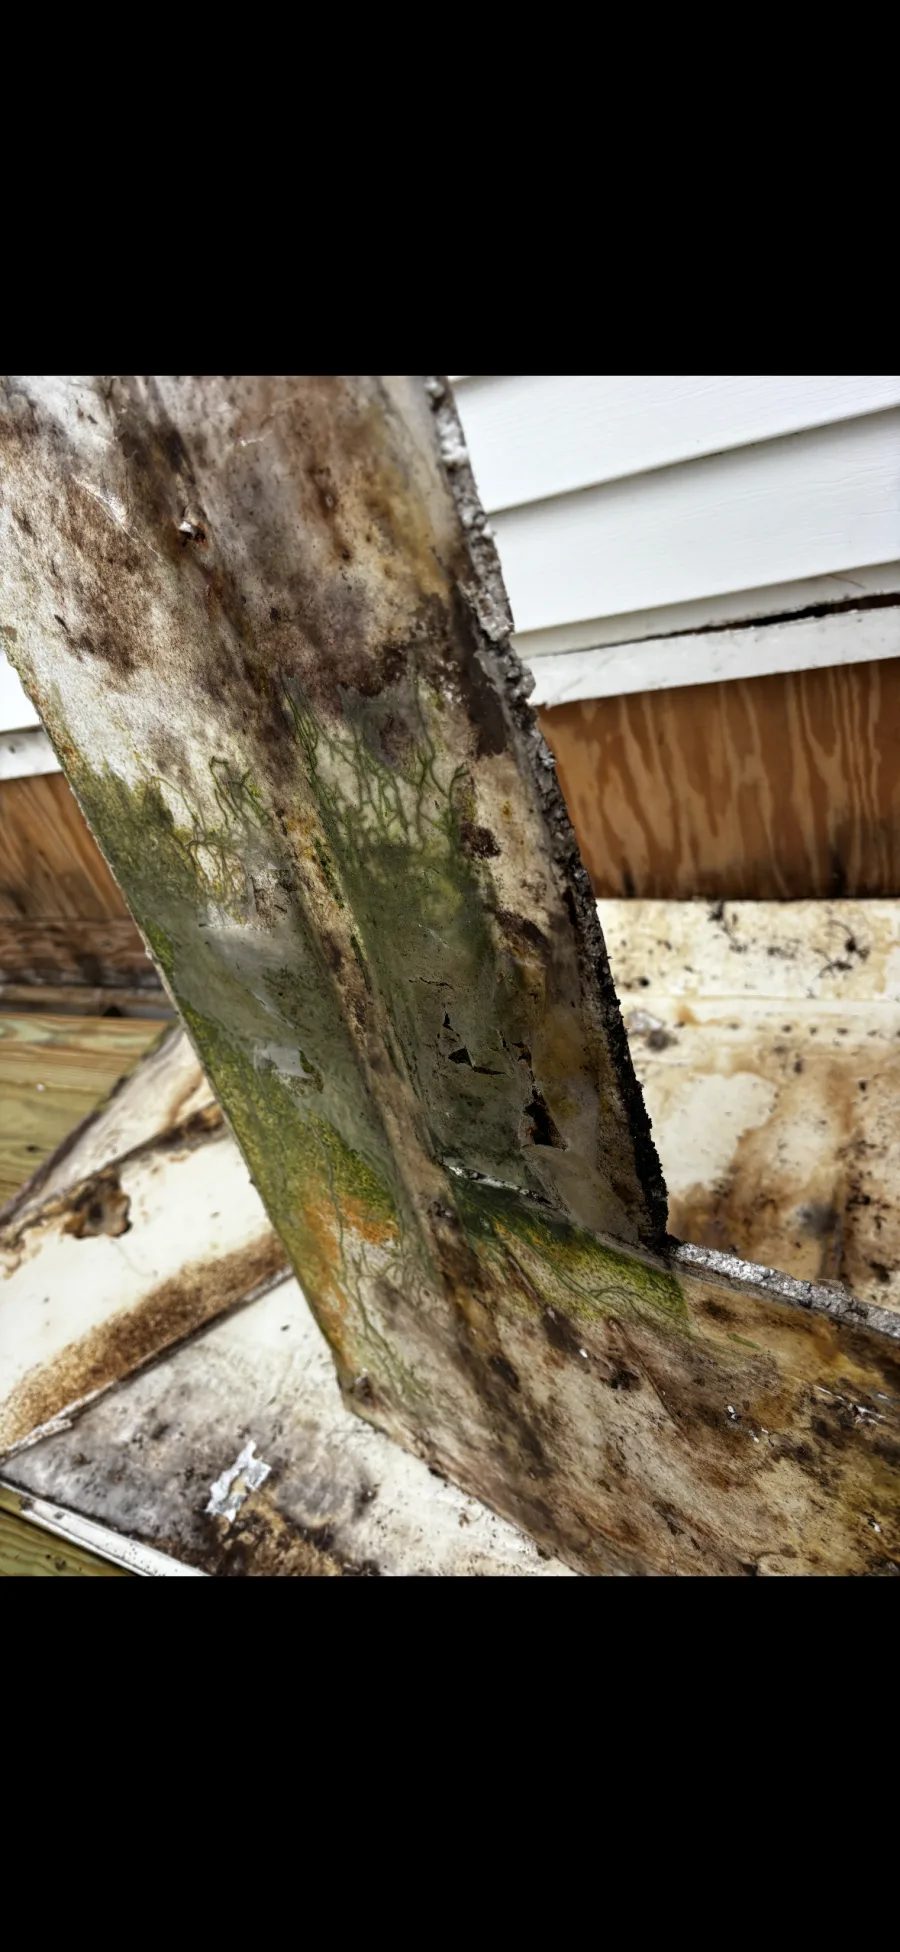
The problem was at a spot where a roof line met an exterior wall directly above a window. It's a transition that requires careful layering to work correctly: the flashing, the housewrap, and the siding all have to overlap in the right order so water always sheds away from the wall and never gets behind it.
Whoever installed this originally got it backwards. Instead of the flashing directing water away from the house, it was acting like a funnel. Every drop of rain and snowmelt from the roof went straight behind the siding and into the wall cavity. The water had been running down the inside of the wall, saturating the sheathing and framing, for what looked like several years.
The Damage Inside the Wall
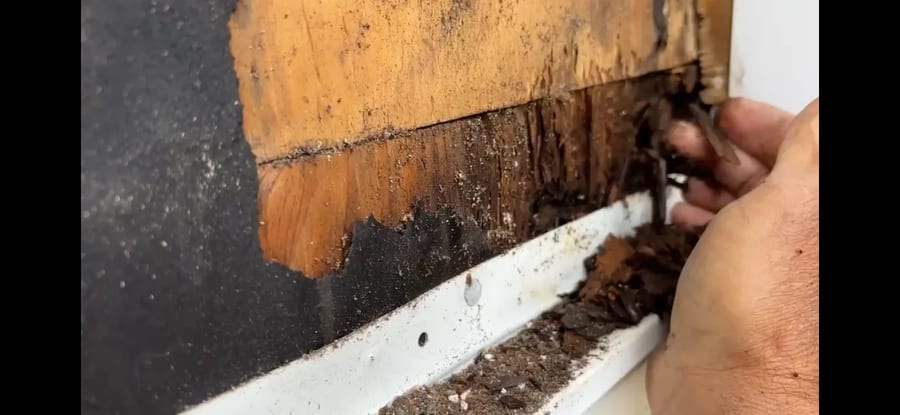
Once we pulled back the siding and got into the wall, the extent of the damage became clear. The sheathing, the structural panel that sits between the framing and the exterior, was completely rotted through in the area below the flashing. The wood had gone soft and dark, and in the worst spots it crumbled when you pressed on it. The framing studs behind it had taken on significant moisture as well.
This is the kind of damage that's invisible from inside the house. The homeowner knew there was a leak, but had no idea that the wall structure itself was compromised. From the interior, the drywall had some staining and soft spots, but the full picture only became visible once we opened it up from outside. This is exactly the kind of situation where drywall repair becomes far more involved than a simple patch job: the source of the moisture has to be eliminated before any interior work can begin.
Important
Wood rot in wall framing is a structural issue, not just a cosmetic one. If you're seeing soft drywall, staining near windows, or paint bubbling on exterior walls, it's worth having someone open up the wall before assuming it's a minor repair.
How We Stopped the Leak
Our goal on this visit was to stop the water from getting in, not to replace the rotted framing, which is a job for a structural contractor. We re-engineered the way the layers overlapped at the roof-to-wall transition so water would finally flow away from the house instead of into it.
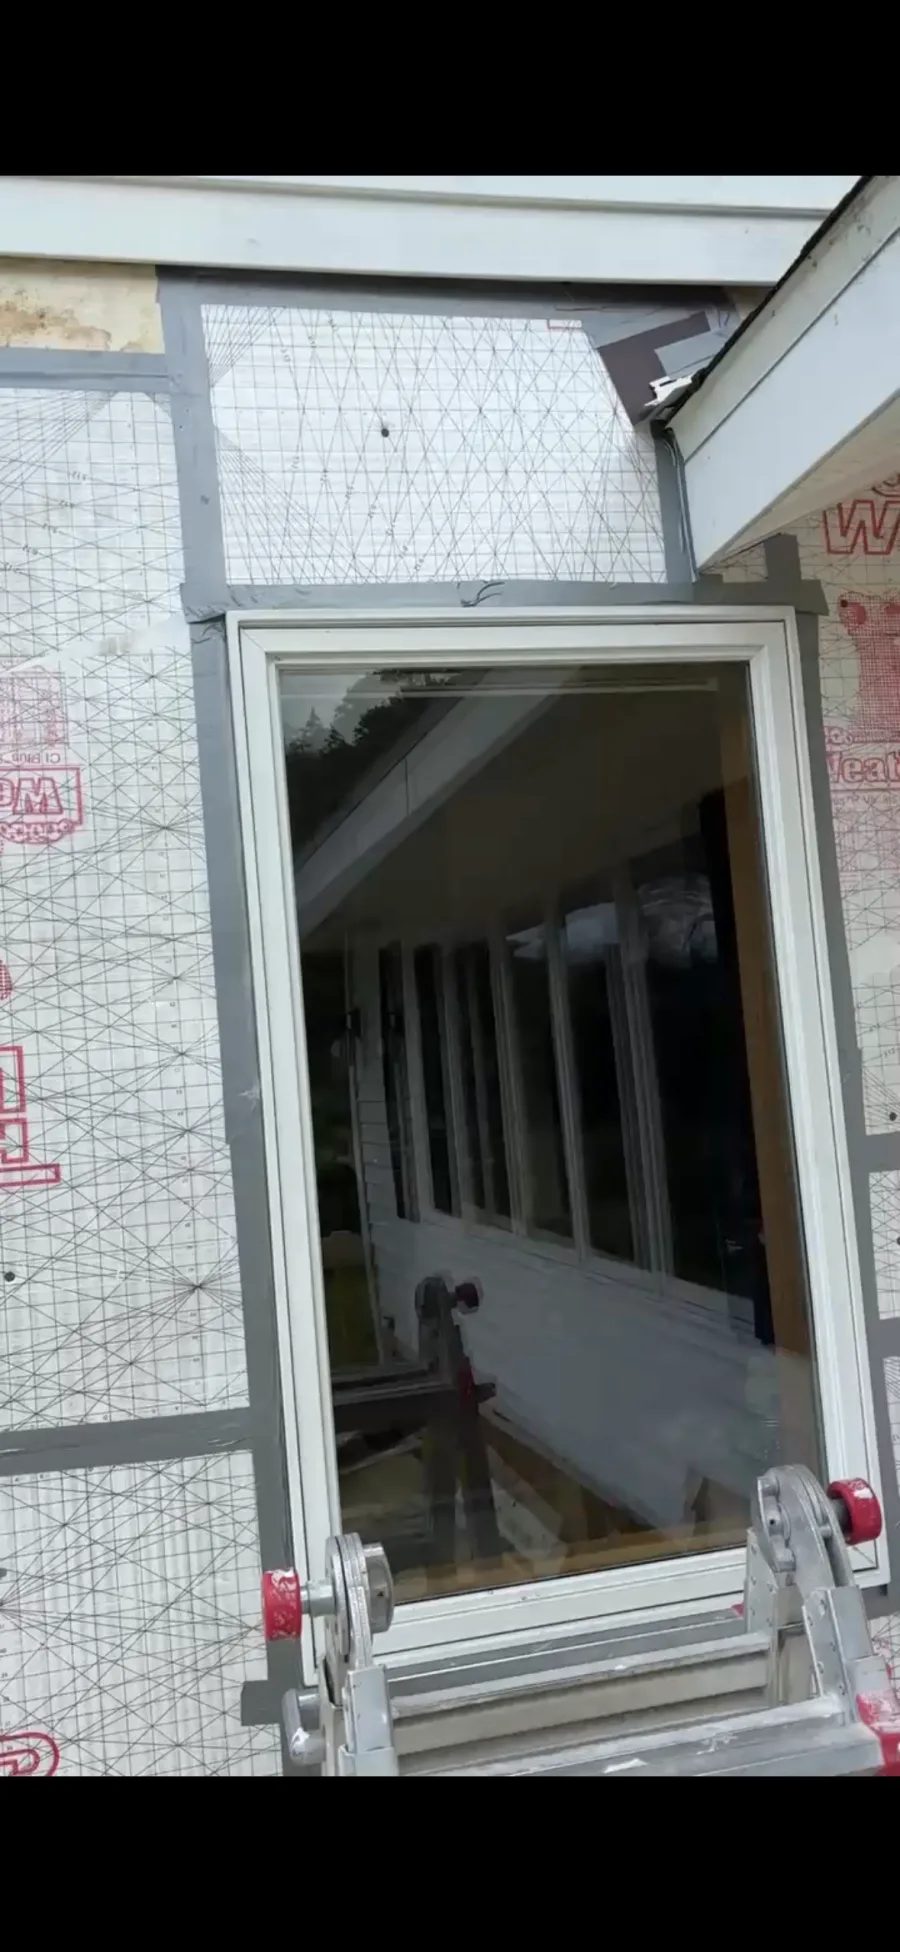
The key material was a heavy-duty Tyvek housewrap, properly lapped and taped at every seam and edge. Tyvek is a vapor-permeable barrier: it lets moisture vapor escape from inside the wall while blocking liquid water from getting in from outside. When it's installed correctly, with the upper layer always overlapping the lower layer (the same principle as roof shingles), it creates a continuous drainage plane that sheds water down and away from the structure.
We also replaced the flashing detail at the roof-to-wall junction, this time with the correct overlap sequence: flashing over the top of the housewrap below, and the housewrap above tucked under the flashing. Every seam was sealed with flashing tape. The window itself was re-integrated into the drainage plane so water that gets behind the siding at any point has a clear path down and out, not into the framing.
What This Fix Is, and What It Isn't
We want to be straightforward about what we did here. This is a temporary repair: a stabilization, not a full restoration. The rotted sheathing and framing are still in the wall. They need to be replaced by a framing crew before the siding goes back on, and before any interior drywall work makes sense. What we did was stop the water from continuing to get in, so the wall can start drying out and the homeowner can get a framing contractor in without the situation getting any worse in the meantime.
For the first time in years, the leak has stopped. The wall is drying. That's a meaningful step forward, but the homeowner understands there's more work ahead.
Why Drywall and Paint Guys Are Doing This
It's a fair question. We're not a siding company. We don't advertise exterior repair or structural work. So why are we the ones who figured this out?
The answer is that our background is construction, not only drywall and paint. We've worked on enough builds, from framing through finish, to understand how a house is put together and how water moves through it. When we look at a water-damaged interior wall, we're not just thinking about how to patch the drywall. We're thinking about where the water came from, what path it took to get there, and whether the source has been addressed. If it hasn't, patching the drywall is a waste of time and money.
That construction knowledge is what makes our interior finish work better and longer-lasting. It's the same reason we're able to handle full remodels and additions with confidence: we understand the whole building, not just the surface. We don't patch over problems. We understand the root cause, and we tell you what it is, even when it means recommending work that's outside our own scope.
What Homeowners in Delaware and Otsego County Should Know About Flashing
Flashing failures are one of the most common causes of hidden water damage in upstate New York homes, and they're particularly common in older construction where the original installation didn't meet current standards. The Halcottsville job is a good example of how long these problems can go undetected. By the time a homeowner notices staining on the interior drywall, the wall cavity has usually been wet for months or years.
A few situations that should prompt a closer look at your exterior flashing and housewrap:
Windows that have leaked before, even if they seem dry now. A leak that stopped on its own usually means the water found a new path, not that the problem was fixed.
Soft or spongy drywall near windows or exterior walls. This is moisture in the wall cavity, not just surface damage. Drywall repair in these situations always needs to start with confirming the moisture source is gone.
Paint peeling on exterior walls in a specific area. Water vapor escaping from a wet wall cavity pushes paint off from the inside.
Any area where a roof line meets a wall. This transition is one of the most flashing-intensive details in residential construction, and it's one of the most commonly done wrong.
If you're in Halcottsville, Oneonta, or anywhere in Delaware or Otsego County and you're seeing any of these signs, we're happy to take a look and give you an honest assessment of what's going on. We can't always fix it ourselves. Sometimes the right answer is to call a framing contractor or a siding specialist, but we can tell you what you're dealing with and point you in the right direction. And when the framing is repaired and the wall is dry, we'll be there for the drywall installation and finish work that comes next.
Frequently Asked Questions
Do you do siding or exterior repair work?
How do I know if I have a flashing problem?
Can rotted framing be repaired, or does it have to be replaced?
What is Tyvek housewrap and why does it matter?
How long does it take for a wet wall to dry out after the leak is stopped?
Written by J&T Construction
Serving Oneonta, NY and Delaware & Otsego Counties for 30+ years.